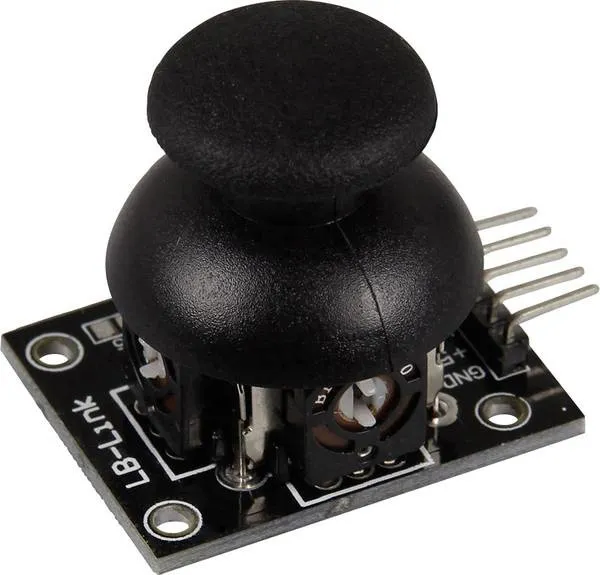
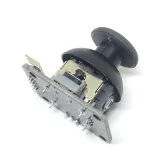
SKU: OT620-B36 Číslo položky: YQ939 EAN: 8720828223031

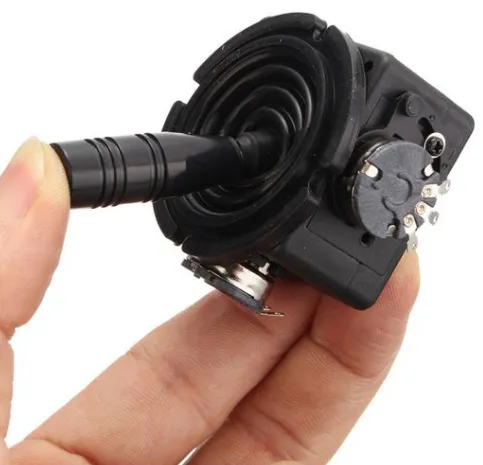
S touto deskou lze polohu joysticku na ose X a Y zobrazit jako analogové napětí na výstupních pinech. Vhodné mimo jiné pro projekty Arduino, Raspberry Pi, ESP8266 nebo ESP32.
zde si prohlédněte Schéma zapojení a ukázkový kód >>>
Modul lze připájet nebo použít na breadboardu.
Rozsah napětí: 0 - 5 V
Provozní napětí: 3,3 - 5V
Rozměry: 34 x 39 x 26 mm
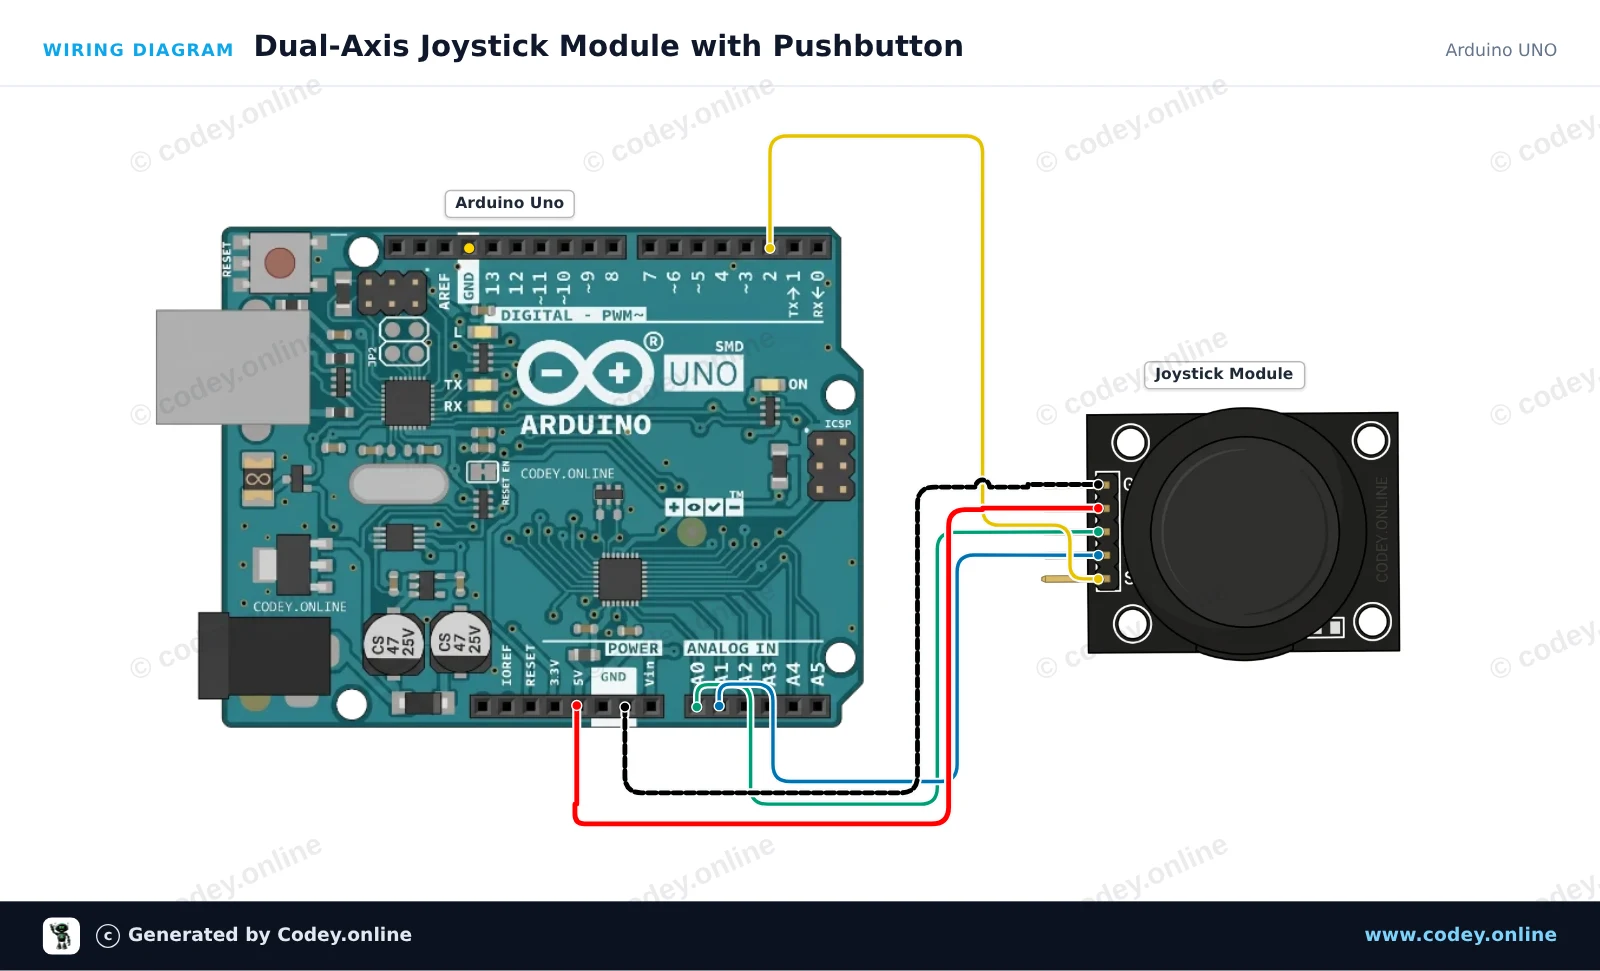
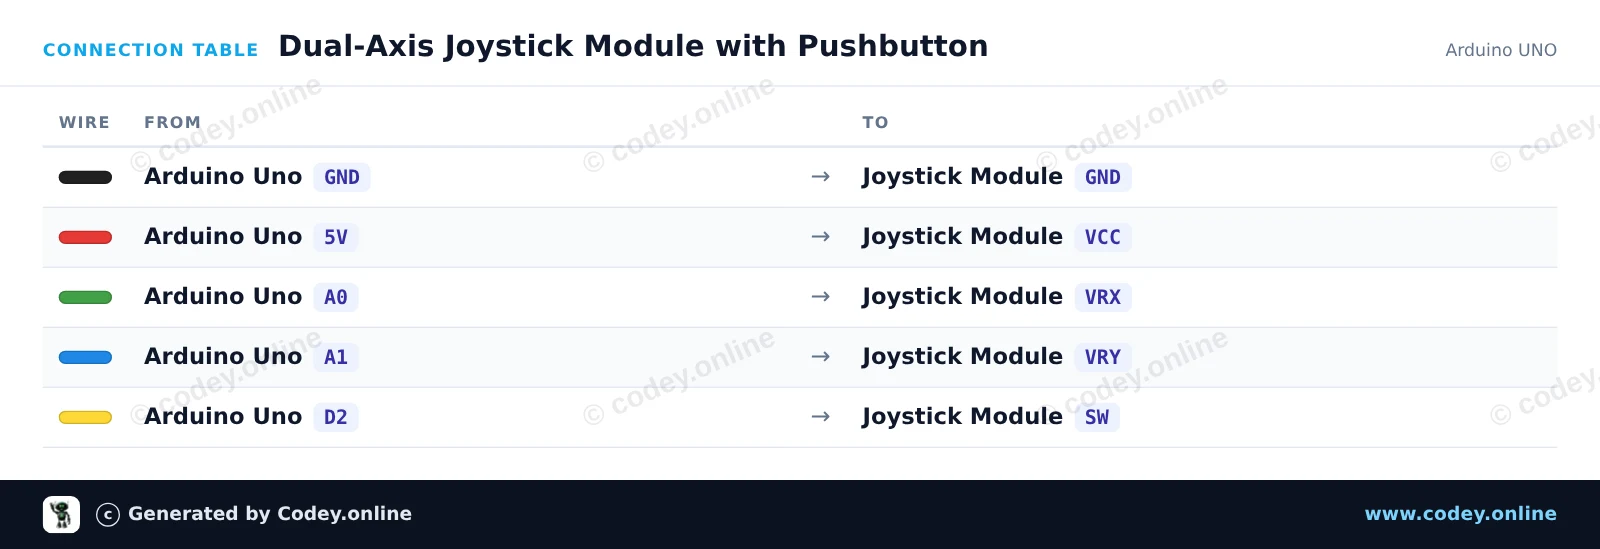
Takto připojíš Joystick modul k Arduino UNO nebo ESP32, s ukázkovým sketchem, který můžeš hned nahrát.
Tento příklad čte analogové polohy os X a Y spolu s integrovaným tlačítkem modulu joysticku. Pohybujte páčkou nebo ji stiskněte dolů, abyste v Serial Monitoru viděli hodnoty polohy v reálném čase a stav tlačítka.
/*
 * ==================================================================
 *  Generated by Codey.online  —  https://www.codey.online
 * ==================================================================
 *  Project   : Dual-Axis Joystick Module with Pushbutton
 *  Board     : Arduino UNO (arduino:avr:uno)
 *  Parts     : Joystick module
 *  Libraries : none (built-in)
 *
 *  Codey Online is an AI-powered browser IDE for Arduino and ESP32.
 *  Describe your project and Codey writes the code, draws the wiring
 *  diagram and uploads it to your board, straight from the browser.
 *  This code is free to use, modify and share, without warranty.
 * ==================================================================
 */

// Pin definitions
const int PIN_X = A0;
const int PIN_Y = A1;
const int PIN_SW = 2;

void setup() {
  // Enable internal pull-up resistor for the integrated pushbutton
  pinMode(PIN_SW, INPUT_PULLUP);

  Serial.begin(115200);
  Serial.println(F("Joystick Module Demo"));
  Serial.println(F("--------------------"));
}

void loop() {
  // Read analog values for X and Y axes (range: 0 - 1023)
  int xVal = analogRead(PIN_X);
  int yVal = analogRead(PIN_Y);

  // Button is active-low (reads LOW when pressed)
  bool isPressed = (digitalRead(PIN_SW) == LOW);

  // Print the results to Serial Monitor
  Serial.print(F("X: "));
  Serial.print(xVal);
  Serial.print(F(" | Y: "));
  Serial.print(yVal);
  Serial.print(F(" | Button: "));
  Serial.println(isPressed ? F("PRESSED") : F("RELEASED"));

  delay(150);
}Wiring diagram and example code generated by Codey.online — https://www.codey.online
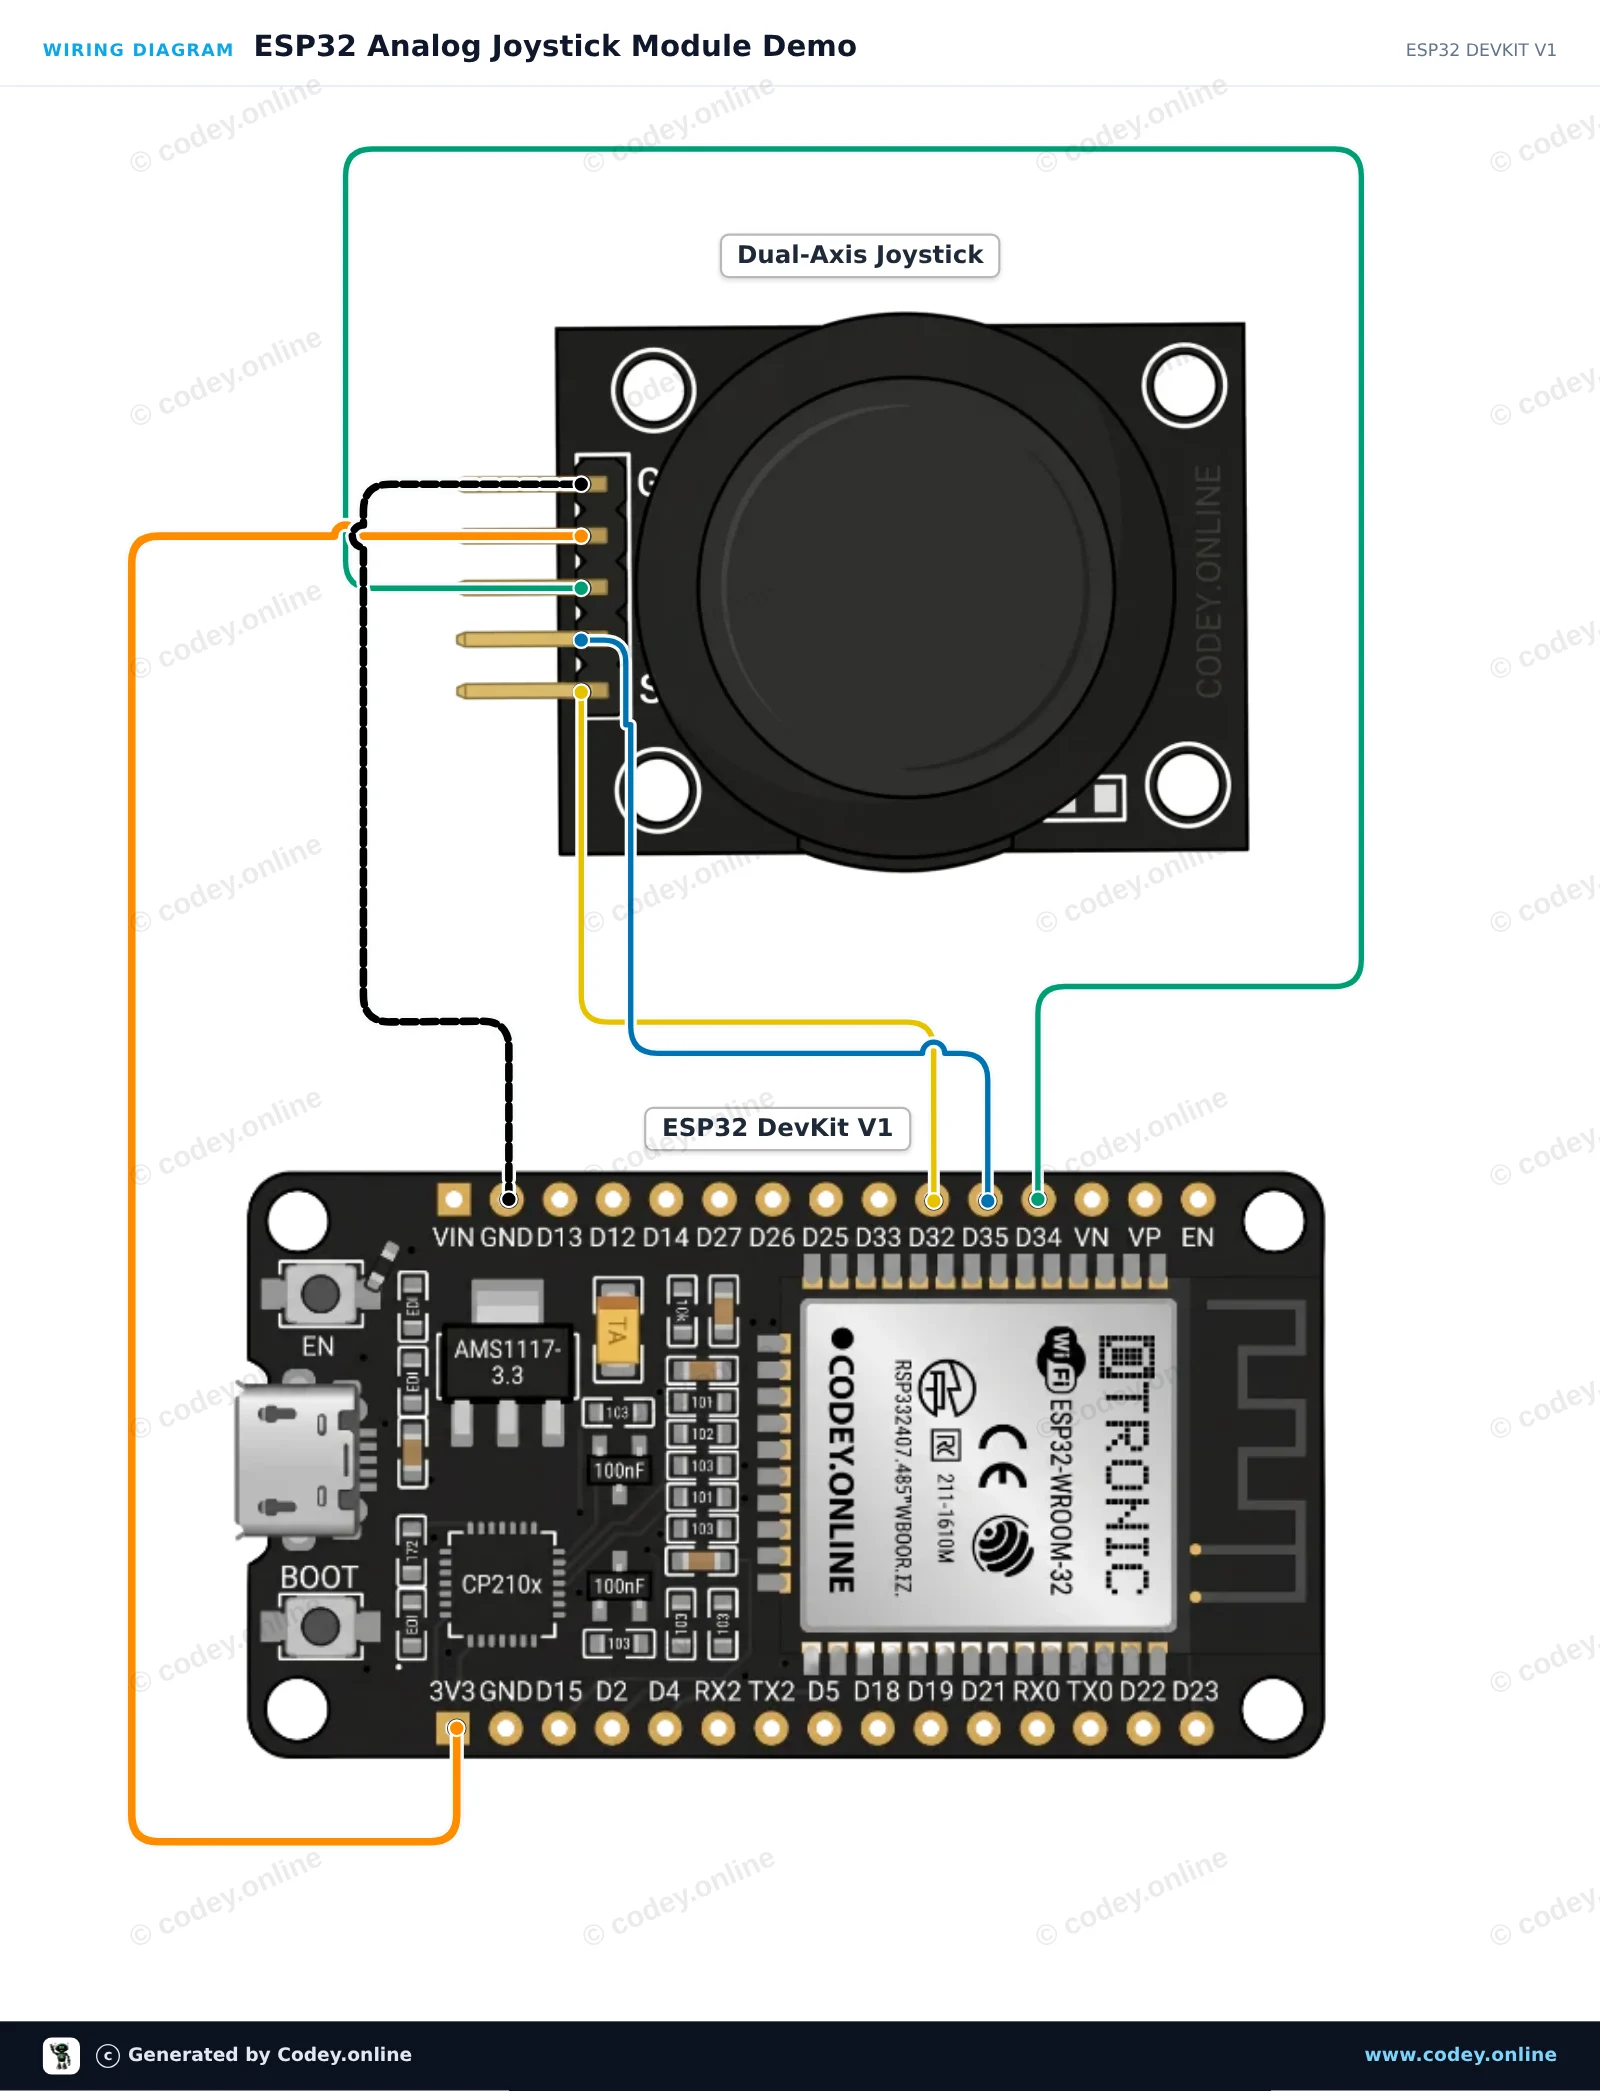
Tento projekt čte polohy X a Y a také stav integrovaného tlačítka z analogového joystick modulu se dvěma osami. ESP32 čte analogová napětí přes GPIO 34 a 35 a stav tlačítka přes GPIO 32. Otevřete Serial Monitor na 115200 baud, abyste viděli souřadnice joysticku a stisky tlačítka v reálném čase.
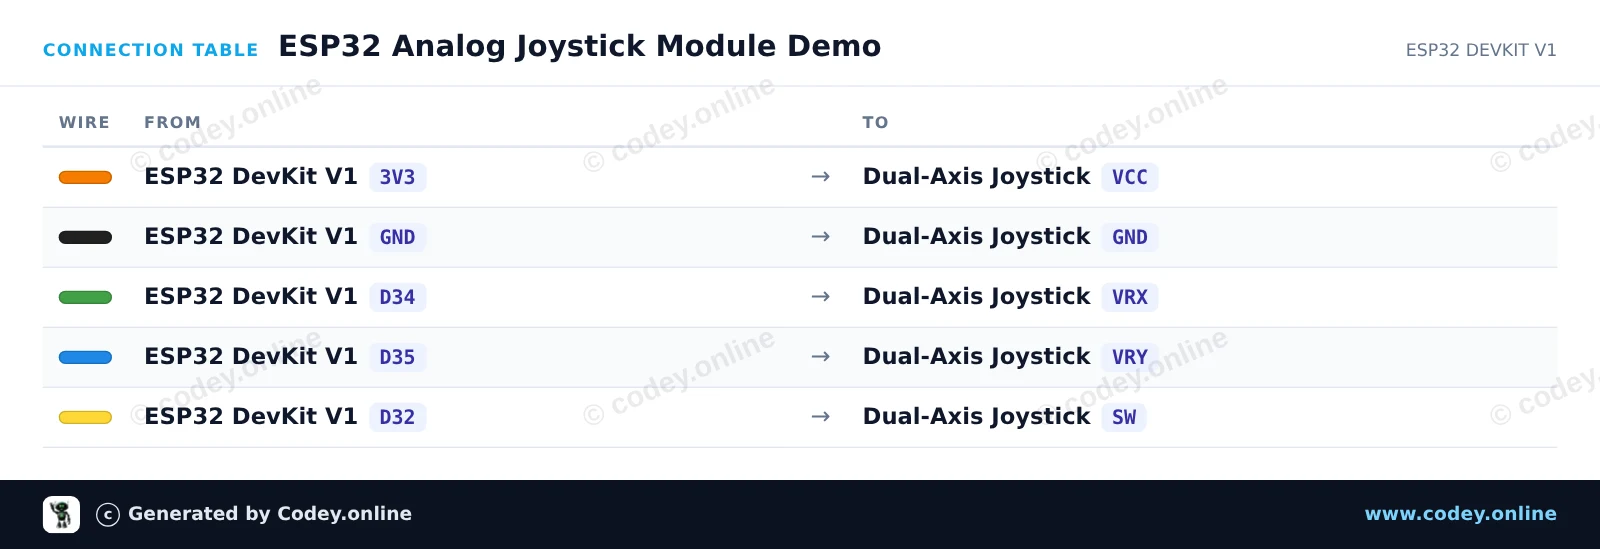
/*
 * ==================================================================
 *  Generated by Codey.online  —  https://www.codey.online
 * ==================================================================
 *  Project   : ESP32 Analog Joystick Module Demo
 *  Board     : ESP32 DEVKIT V1 (esp32:esp32:esp32doit-devkit-v1)
 *  Parts     : Joystick module
 *  Libraries : none (built-in)
 *
 *  Codey Online is an AI-powered browser IDE for Arduino and ESP32.
 *  Describe your project and Codey writes the code, draws the wiring
 *  diagram and uploads it to your board, straight from the browser.
 *  This code is free to use, modify and share, without warranty.
 * ==================================================================
 */

// Pin definitions (using bare GPIO numbers for ESP32)
const int pinVRX = 34;
const int pinVRY = 35;
const int pinSW  = 32;

void setup() {
  Serial.begin(115200);

  // Configure push-button pin with internal pull-up
  pinMode(pinSW, INPUT_PULLUP);
}

void loop() {
  // Read analog values from joystick potentiometers (0 - 4095 on ESP32)
  int xVal = analogRead(pinVRX);
  int yVal = analogRead(pinVRY);

  // Read digital state of the integrated switch (LOW when pressed)
  bool isPressed = (digitalRead(pinSW) == LOW);

  // Print the readings to the Serial Monitor
  Serial.print("X: ");
  Serial.print(xVal);
  Serial.print(" | Y: ");
  Serial.print(yVal);
  Serial.print(" | Button: ");
  Serial.println(isPressed ? "PRESSED" : "RELEASED");

  delay(100);
}Wiring diagram and example code generated by Codey.online — https://www.codey.online





 English
  Nederlands
  Frans
Frans  Deutsch
  Italiano
  Español
  Suomi
Suomi  Polski
  Dansk
Dansk  Ελληνικά
  Български
  Hrvatski
  Aileen